Stingray Corvette Forum banner

How to: Programming and installing Mods4Cars SmartTOP convertible top modules

2 reading
36K views 40 replies 15 participants last post by  Administrator jsvette  
#1 · (Edited)
As per this thread: http://www.stingrayforums.com/forum....com/forum/stingray-corvette-accessories/14489-convertible-top-enhancement.html the SmartTOP control system is an add-on for our C7 convertibles (and other cars) that allows a number of enhancements. These include the ability to raise and lower the top without continuously holding either the dash button or the remote button, the ability to raise the top from the remote, and the ability to raise and lower the windows from the remote.

CAUTION: As Mods4Cars says, you're responsible for the safe operation of your car. Raising the top or windows remotely, or even raising and lowering the top without holding the button, potentially increases the possibility of a passenger or bystander being injured. Being able to release the button does not eliminate the need to pay attention to what's going on, and immediately stopping the motion if necessary. The SmartTOP module does allow you to easily cancel the operation, but it's up to you to do so. Unlike the windows, the power top will not reverse motion is someone sticks their arm between the top and windshield header. By following the instructions in this thread, you accept all liability for any problems or injuries that may occur, acknowledge that the author has no liability for these instructions, and agree to indemnify the author against any and all liability associated with installing the SmartTOP module in your car.

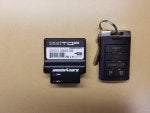
The SmartTOP is a small, high quality module.


The custom wiring harness makes installation almost completely plug 'n' play.


Before installing the module in your car, you'll want to connect it to your computer (Windows or Mac), see if there is any updated firmware and install it if there is, then do your initial programming of the available operating modes. This is very easy, even if Mods4Cars written instructions are not quite as clear as they could be. When you open the box, you'll notice the inside of the lid provides the URL and instructions on where to find any available updates. In the event Mods4Cars changes their web site, follow their instructions, not mine, to find the appropriate files.

Post #2 in this thread provides instructions for performing the firmware update. Post #3 the physical install in the car.
 
#2 · (Edited)
FIRMWARE UPDATE:

As mentioned above, perform any needed firmware updates before doing anything else with the module. Mods4Cars has already released a firmware update for the first batch of modules. If you order later, you may get the latest firmware built in, but it's always a good idea to check I also suggest programming the operation options now, too, but you can easily change these options later if you wish. Don't worry if these instructions seem long and complicated. It will take you longer to read through this post than to actually do the update.

Oh, yes, you'll need to be connected to the internet for all of this.

Preparation:

As Mods4Cars is not a supporting vendor, I won't post direct links to the site, but all of this is easy to find. First, go to their website, choose your country and click "Enter," then click on the link for Updates.


Choose the USB link on the next screen.


Which will take you here. DOWNLOAD and read through the update portion of this manual. You might want to print it and have it available for easy reference.


Mac Users: I don't have a Mac, so I can't help with that, but it looks like the process is pretty much the same. Be sure to read the knowledge base article linked on that page before proceeding.

Windows Users: If you're still running Windows XP, Buy Yourself A New Computer Immediately! Seriously. Windows XP is so full of security holes your computer is probably infested with malware, even if you don't know it. But if you insist on using it, download this from their website and double click the downloaded file to install it: CDM v2.12.00 WHQL Certified.exe Executable setup, ONLY needed for XP! (If you're using any version of Windows older than Windows 7 you really should upgrade, but that's a different story for a different forum.)

For everyone on Windows, download this file: m4cconnect v1.33 USB update and support software (Windows). Don't do anything with it yet, but note where the file was downloaded to.

Install the Update:

Connect the included USB cable (This cables uses a Mini USB connector, not the more common Micro USB used on most phones and tablets) to the module, and the other end to your PC. The green LED should light up. If it doesn't, turn on your computer. ;) If it still doesn't light up, try another USB port on your PC, or another PC. If it still doesn't light up, open a support ticket with Mods4Cars.


Now find the m4connect file you downloaded earlier, and double-click it to start the program. This is what you should see. .


Click on the "Connect' button and you'll see something very close to this (but without my car in the background :D). If yours says there is a firmware update available (1), click on the Firmware tab (2) at the top of the window.


IMPORTANT: When applying the firmware update (below), it is vital that nothing interfere with the process. It only take a few moments, but be sure that nothing can cause the USB cable to be disconnected, or your PC to shut down in the middle of the process. Keep your cat away from your keyboard and the USB cable. If using a laptop, make sure the battery has some charge. If using a desktop, I wouldn't advise doing this in the middle of a thunderstorm. If your internet connection is unreliable, you might want to go to Starbucks to do this. Other than that, it's really no big deal. Like I said, it only takes a few moments.

Next, click on the Check For Update button. The program will download the update for your module and install it. You'll see a green progress bar at the bottom of the window, and when it's done you'll see something very much like this. Don't worry about the line that says "Functions and Settings Unchanged." That's referring to programming the options, which we'll get to in the next post.


That's it! You've updated the firmware. Congratulations! I would suggest making a note of the firmware you installed, and save that for future reference. You can check the Mods4Cars website periodically to see if newer firmware is available.

Leave the module connected to your computer, because the next step will be to program the operating functions (next post).
 
#18 ·
Now find the m4connect file you downloaded earlier, and double-click it to start the program.
It ACTUALLY WORKS PERFECTLY! I was sure I'd break that grey plug that didn't want to come out of its socket.

I had some serious problems finding the "m4connect" (would only download from Apple "iTunes store") which disabled both USB ports of my MacBook. Their excellent support solved it (reboot computer) by telephone from Switzerland at 11pm (their time). I think it was the company's owner who repeatedly answered my phone calls at that time of night.

Thank you, meyerweb, for your advice, encouragement and support!
 
  • Like
Reactions: meyerweb
#3 · (Edited)
PROGRAMMING and OPERATING the SmartTOP: (Completed on 9/2/16)

CAUTION: As Mods4Cars says, you're responsible for the safe operation of your car. Raising the top or windows remotely, or even raising and lowering the top without holding the button, potentially increases the possibility of a passenger or bystander being injured. Being able to release the button does not eliminate the need to pay attention to what's going on, and immediately stopping the motion if necessary. The SmartTOP module does allow you to easily cancel the operation, but it's up to you to do so. Unlike the windows, the power top will not reverse motion is someone sticks their arm between the top and windshield header. By following the instructions in this thread, you accept all liability for any problems or injuries that may occur, acknowledge that the author has no liability for these instructions, and agree to indemnify the author against any and all liability associated with installing the SmartTOP module in your car.

This is even easier than applying the firmware update, but Mods4Cars instructions take a little work to understand. First, let's look at the process, then I'll try to explain what each option does. With your module plugged into the computer via the USB cable, and the m4connect app running, click on the Settings tab.


The program will connect to your module and display the current settings.


To change the settings, simply click the up or down arrows next to each of the Functions 1 through 3. You can set function 1 to values of 0 or 1, and functions 2 and 3 to values of 0 through 4. Once you've made your settings, just click " Write to Module." Don't worry too much about your choices, because you can change them later, either with a PC or using the car's built in switches.


The complicated part is understanding what each of these settings do. It's taken me a few reads, but I think I've got it, now.


Function 1 turns the module on and off. If you set the value to 0, the module does nothing, just as if you hadn't installed it at all. Obviously you'll want to set this to 1.

But, as Mods4Cars says:

EXTREMELY IMPORTANT: In order to avoid problems with diagnostic tools and to avoid confusion or injury by unexpected features or functionality we urge you to ALWAYS DISABLE the module before taking the car to a shop or lending it to anyone!
This is good advice. Someone who doesn't expect the top to operate continuously could panic or injure themselves when the top continues to move after they release the button. It could also make your dealer unhappy with you. You don't need to use a PC to disable the module. I'll get to that later.


Function 2 determines how the dash button works when lowering the top. There are five settings:

  • Setting 0: Turns this function off. Lowering or raising the top from the dash switch will work just as it does without the module. You'll have to hold the button down the entire time.
  • .
  • Setting 1 Lowering Top: With the ignition ON, press and release the down side of the dash button, and the windows will go down, the top will lower completely, and the windows will go back up. If you turn off the ignition while the top is in motion, the top will stop where it is. Given how most Corvette owners seem to feel about driving with the top down and windows up, this probably isn't the setting you'll use.
  • .
  • Setting 2: With the ignition ON, press and release the down side of the dash button, and the windows will go down, the top will lower completely, and the windows will remain down.. If you turn off the ignition while the top is in motion, the top will stop where it is.
  • .
  • Setting 3: This operates exactly like setting 1, except for the following: If you turn off the ignition while the top is in motion, the top will continue to lower until the operation is complete. YOU are responsible to make sure you don't just walk away without paying attention.
  • .
  • Setting 4: This operates just like setting 2, except for the following: If you turn off the ignition while the top is in motion, the top will continue to raise or lower until the operation is complete. YOU are responsible to make sure you don't just walk away without paying attention.

Important: To stop any automatic operation press either side of the dash switch while the top is in motion. You can also operate the top manually by holding the console button for 2 seconds or longer. If you let go after that, the top will stop, just as it does now.


Function 3 determines how the remote buttons works when lowering the top. These settings are completely separate from the dash switch. You could set the dash switch to leave the windows down and the remote to leave the windows up, if you want. There are five settings:

  • Setting 0: Turns this function off. Lowering the top from the remote will work just as it does without the module. You'll have to hold the button down the entire time. You can't raise the top using the remote.
  • .
  • Setting 1: Hold the UNLOCK button down for 5 seconds and release. The top will lower completely, and the windows go to the up position. If you start the car while the top is in motion, or open the door, or lock the car with the remote, top motion will stop.
  • .
  • Setting 2: Hold the UNLOCK button down for 5 seconds and release. The top will lower completely, and the windows remain in the down position. If you start the car while the top is in motion, or open the door, or lock the car with the remote, top motion will stop.
  • .
  • Setting 3: Hold the UNLOCK button down for 5 seconds and release. The top will lower completely, and the windows go to the up position. If you start the car while the top is in motion, or open the door, or lock the car with the remote, top motion will continue. Once again, you're responsible for what happens if you walk away while the top is in motion.
  • .
  • Setting 4: Hold the UNLOCK button down for 5 seconds and release. The top will lower completely, and the windows remain in the down position. If you start the car while the top is in motion, or open the door, or lock the car with the remote, top motion will continue. Once again, you're responsible for what happens if you walk away while the top is in motion.

Important: If you've programmed settings 1 or 2 you can stop the motion of the top by pressing either the lock of unlock button. If you've programmed mode 3 or 4, you need to push one of those buttons twice.


That's it for programming options. Hopefully the above makes sense. If any of it is confusing, post or PM me and I'll try to make things clearer.
.
.
.
.

"HEY!" you're saying, what about raising the top? There are no programming options for top up, but you can control it. I kind of wish the same options as above existed, but it is what it is. Read on.

  • To close the top and the windows with the dash switch, tap the up side of the dash button once.
  • To close the top and leave the windows with the dash switch open, tap the up side of the dash button twice.
  • To close the top and the windows with the remote, press the LOCK button and hold for 5 seconds. There is no one step way to close the top and leave the windows open.


Finally, you can control the windows via the remote, independent of the top controls.

  • To ower the windows: tap the UNLOCK button 3 times quickly.
  • To raise the windows: tap the LOCK button 3 times quickly.
  • To lower the windows into vent position: Raise the windows as above, then press the Lock button one more time after the windows are all the way up.


That's pretty much it. I might need a cheat sheet to remember all the remote control functions until I get used to them.

Oh, wait. I told you you could turn the module on and off without using a computer. It took me several tries of reading through the instructions and trying to do this before I got it figured out. The problem was really me not paying close enough attention to what I read, but maybe I can make this a little bit more clear. For this step, start with the top in the UP position. Obviously, the SmartTOP must be installed and enabled.

  • Turn the ignition on by holding the start button down for 8 seconds without pushing in the clutch.
  • Press and hold top up button until the left turn signal indicator blinks, then the right indicator blinks, and you hear a beep. Now you're in programming mode, ready to program Function 1 (Disable / Enable the SmartTOP).
  • Push the top DOWN button once. You've disabled the SmartTOP.
  • Exit programming mode by holding either the top up or down button for 5 seconds. Both signal indicators will flash once and you'll hear a beep.

NOW TEST the operation by pressing and releasing the top down button. Nothing should happen.

To re-enable the SmartTop, do the following. Again, start with the top in the UP position. Obviously, the SmartTOP must be installed and disabled.

  • Turn the ignition on by holding the start button down for 8 seconds without pushing in the clutch.
  • Press and hold top up button until the left turn signal indicator blinks, then the right indicator blinks, and you hear a beep. Now you're in programming mode, ready to program Function 1 (Disable / Enable the SmartTOP).
  • Push the top DOWN button once. The right turn indicator blinks once. You've enabled the SmartTOP.
  • Exit programming mode by holding either the top up or down button for 5 seconds. Both signal indicators will flash once and you'll hear a beep.

TEST the SmartTop. It should operate as you previously programmed it.

Again, if any of this isn't clear, or you run into any problems trying to follow them, please let me know. I've read and reread these multiple times, but I may have gotten something wrong on unclear.
 
#4 · (Edited)
INSTALLATION INSTRUCTIONS

The mods4cars written instructions are actually very good. But there are a few things that could be clearer, and I can add a few tips, so here goes. Due credit to mods4cars: much of this is borrowed from their instructions.

CAUTION: As Mods4Cars says, you're responsible for the safe operation of your car. Raising the top or windows remotely, or even raising and lowering the top without holding the button, potentially increases the possibility of a passenger or bystander being injured. Being able to release the button does not eliminate the need to pay attention to what's going on, and immediately stopping the motion if necessary. The SmartTOP module does allow you to easily cancel the operation, but it's up to you to do so. Unlike the windows, the power top will not reverse motion is someone sticks their arm between the top and windshield header. By following the instructions in this thread, you accept all liability for any problems or injuries that may occur, acknowledge that the author has no liability for these instructions, and agree to indemnify the author against any and all liability associated with installing the SmartTOP module in your car.

[mods4cars] explicitly point out that all functions of this control unit should be used only while exercising caution and responsibility. We can NOT be held liable for any damage or injury caused by installing or using this product. PLEASE READ THE COMPLETE MANUAL CAREFULLY BEFORE USING THIS PRODUCT.
EXTREMELY IMPORTANT: In order to avoid problems with diagnostic tools and to avoid confusion or injury by unexpected features or functionality we urge you to ALWAYS DISABLE the module before taking the car to a shop or lending it to anyone! If problems arise while the module is installed that might be related to our product, ALWAYS contact Mods4cars directly first and enter a support ticket. NEVER take the car to a dealer without getting support first!
OK, so download and print mods4cars' instructions. And read them. Or at least read them online. Pay attention to the warnings and cautions. By installing this, you've pretty much eliminated GM's liability for anything that goes wrong, and taken the liability on your shoulders. If something goes wrong because you didn't pay attention to the warnings or follow the instructions, good luck to you.

Remove the Waterfall

The existing top control module, and the connectors you need to access, are behind the waterfall between the seats. Removing it is easy-peasy (TM). First, put the ignition into accessory mode and lower the top. Then begin to raise the top. When the tonneau cover is as far back over the trunk as it will go, let go of the top button and shut off the ignition to make sure the tonneau doesn't later move on it's own. A minute or two after you turn off the ignition, the car will beep at you for 20 seconds or so. That's fine, you can ignore it.


Then you'll need to remove the two Torx screws that hold the waterfall on. Use a #30 Torx bit. The screws on mine were pretty loose.


Then remove the two plastic retainer pins that hold the waterfall from the rear. Look from the back of the car and you'll see them. There's one behind and below each of the Torx screw locations.


The easiest way to get these out is with a plastic trim tool. You can get a set of these from Amazon for $10 or less, and they're worth their weight in gold. (In fairness, they don't weigh very much.) Your local auto parts store may have them, too. If you don't have a trim tool, work a small screwdriver under the center part of the pin and pull it out until you can get your fingernails under it, then pull the center all the way out. Once the center is out, you can simply pull the whole retainer out with your fingers.


The lift the waterfall up. You'll need to angle the bottom out slightly to clear the metal bracket underneath. I used another tool from my trim set, but you can just pull it up with your fingers.


Now you've got the top module and its connectors exposed. Remove the gray connector on the drivers side of the car by pulling the red tab (1) out, then wiggling the connector from side to side as you pull it out. I used a small flat blade screwdriver to pull out the red tab.


Now take the wiring harness that came with the SmartTOP. Plug the light gray connector with the red tab into the GM controller, where you just disconnected the OEM connector. Make sure it's fully seated, and then push the red tab in to lock it in place. Connect the OEM cable to the other light gray connector of the SmartTOP harness. Make sure it's fully seated, and push the red tab in.

Optionally, Connect the USB cable to the SmartTOP module (as you did for programming it). This isn't required, but if mods4cars provides any new firmware upgrades you won't have to remove the waterfall to update the module.

Finally, attach the dark gray connector from the wiring harness to the socket on the SmartTOP.

There's only one way all of these connectors can fit. You can't hook it up wrong, other than by not connecting something at all. The following pic shows all the connectors in place.


Now let's check to make sure it's working. First, turn on the ignition (hold the start button for 8 seconds without pressing the clutch. Make sure the green light on the SmartTOP is blinking. (Mine actually started blinking even before I turned the ignition on. I think because I was in accessory mode.) If it's not blinking, make sure all the connections are tight. Turn the ignition off and back on again. If it's still not blinking, contact mods4cars.

Finally, plug the ODB module into the ODB connector under the dash, just to the left of the hood release. Make sure the connector is seated firmly. The ODB module is necessary to control the windows. If you want, you can leave this out, but the windows will work as they do from the factory, remaining down after any top motion. You won't be able to control the windows from the remote, either. The other SmartTOP functions will continue to work.


Assuming the LED is blinking, it's time to test the module. Make sure none of your tools, parts, or the waterfall are where they could get in the way of the top and tonneau motion. If any of these tests fail, contact mods4cars support.

  • With the ignition on or in accessory mode, tap the bottom of the dash switch once. The tonneau cover should close. Tap the top of the dash switch once. The top should go through it's full motion, close, and the windows go to the position you programmed. (Watch your fingers!)
  • Tap the bottom of the dash button again. The windows should go down, the top retract, and the windows go to where you programmed them.
  • Grab your remote and get out of the car. Press and hold the LOCK button for 5 seconds, until the top starts moving, then release the button. The top and windows should go through the full cycle, ending up with the top up.
  • Press and hold the UNLOCK button until the top starts moving, then release. The windows and top should go through the full cycle and end up with the top down.


NOTE: Be sure to also test the interrupt functions. From inside the car, with the top in motion, press the top or bottom of the dash switch. The top should stop moving. From the remote, press either the LOCK or UNLOCK button (if you programmed options 1 or 2) or press the LOCK or UNLOCK button twice (if you programmed options 3 or 4). If the top doesn't stop moving, contact mods4cars, as this is a serious safety issue.

Finally, you can test the windows function described in post #3, above.

If everything is working correctly, use the supplied Velcro to attach the SmartTOP module. Clean both the back of the SmartTOP and the front of the OEM controller with some alcohol, then attach the Velcro. I mounted the SmartTOP to the side of the OEM controller so as to not stick the Velcro on the existing label. That way I can remove it completely without damaging GM's label. I also put a small piece of Velcro on the light gray connector where the OEM connector plugs into the wiring harness, and stuck that to the exiting frame, below the top controller, to make sure it doesn't rattle.

Now reinstall the waterfall. Put it in place, line up the holes, and insert the plastic retainer pins and push in the center posts. Replace the Torx screws. Remember you're tightening against plastic. Don't demonstrate your manhood when torxing them down. Clean up, and have fun!
 
  • Like
Reactions: CAB6 and dwward
#6 · (Edited)
Initial review of the SmartTOP module for the C7 convertible

TL;DR version: Brilliant! Simply Brilliant! :very_drunk:


Long version: Brilliant! Simply Brilliant! :D

I've only used it in testing while sitting in my garage, and a few short trips (edit) but so far it does everything I wished the stock top did, and more. A few of my favorite things:

  • Being able to tap the top down button and go about my business: take off my regular glasses and put on suns. Take the sunscreen out of the windshield. Put on my hat. Buckle my seatbelt. Etc., etc., etc.
  • Being able to tap the top up button, and ditto the above. Take off my sunglasses, put in the sunscreen, etc. AND have the windows go up at the end of the cycle.
  • Being able to raise or lower the top while in motion, and still keep both hands on the steering wheel, or shift and steer at the same time.
  • Being able to lower the top with the remote without having to hold down the button. This actually has a hidden advantage. Not infrequently, when I lower the top remotely, the signal gets lost halfway through and the top stops moving. No longer a problem with the SmartTOP, because once the top starts moving the car no longer needs the signal from the remote.
  • With the remote programmed to Function 3, Setting 4, I can start the top down action while walking up to the car. Even if the top is still moving when I get there, I can open the door and climb in without stopping the top motion. Very cool!


Less important to me, but still cool:

  • Being able to raise the top with the remote. Not something I'll use often, but I can see situations where I left the top down, and now want to raise it again (the sky's clouding over and it looks like rain, for example.)
  • Being able to raise the windows remotely (See above)
  • Being able to lower the windows from the remote, without also lowering the top.
  • Being able to crack the windows a little bit after raising them. I'd prefer they open a little further than they do, however.

I've run into one possible, but minor issue. In one of my tests trying to lower the windows from the remote, the windows only went half way down, then stopped. I've seen one other report of this happening intermittently. Pressing the unlock button three times completed the cycle, so it's not a major flaw, but if it happens again I'll submit a ticket to Mods4Cars. Other than that, everything has worked as I expected it to.

Edit: mods4cars has read this thread, and say the instructions are spot on. They also told me if I have any more problems with the windows not going all the way down, to submit a ticket. They implied they would replace the OBD II module if problems continue.
 
  • Like
Reactions: CAB6 and dwward
#7 · (Edited)
SmartTOP in operation!


BTW, I have no control over the, umm, somewhat odd videos YouTube provides links for when my videos end.
 
#9 ·
Excellent how-to thread!
 
#10 ·
Is it known if the 30 MPH limit for top motion is still enforced?
 
#11 ·
I haven't tested it, but it should be. The SmartTOP doesn't replace the factory top controller, it just tricks it into thinking you're still holding the button down, and that you're using the dash button (to raise the top) instead of the remote. If it's not raining tomorrow, I'll find out.
 
  • Like
Reactions: Mobius
#12 · (Edited)
BTW, one interesting note. In conversation with mods4cars, they referred to the OBD module as "the window valet" Looking at the official Window Valet web site, the two devices look identical except for the label on the Window Valet, and the all the operations are exactly the same (e.g., tap UNLOCK 3 times to lower the windows, tap LOCK 3 times, wait until the windows close, tap LOCK again to crack the windows for venting, etc.). So it appears mods4cars has sourced the window module from Top Down Tech, manufacturer of the Windows Valet. Given that the Window Valet itself lists for $150, it makes the price of the SmartTOP a little more understandable / palatable.

I, personally, consider the price to be well worth the added convenience.
 
#16 ·
I haven't (so far) had a recurrence of the windows only going down half way. This isn't a mod that anyone needs, but I'm absolutely delighted with the newfound convenience.
 
#19 ·
FYI, I have been told that mods4cars is testing a software fix to resolve the problem where the windows sometimes only go half way down. I still haven't had this problem other than the very first test, but some other purchasers find it a bigger problem.
 
#20 · (Edited)
I like it - thanks again for the detailed instructions.

I updated the unit with the latest firmware before installation, and everything works as advertised, but I have noticed one "glitch".

I noticed that if I hold the unlock button for 5 seconds (which initiates top lowering), and then release it before the windows have fully lowered, the top goes down fully but the windows will not lower fully. This has been (so far) completely repeatable.

So, I now hold the button for ~six seconds, until the windows have fully lowered.

UPDATE: There have now been instances where continuing to hold the unlock button longer had the result that the windows only partially went down.
 
#21 · (Edited)
^^^

I haven't noticed that, and I think I'm releasing it as soon as I detect motion. But I'll check tomorrow. I'd recommend opening a ticket with mods4cars. They seem to be very responsive. They've asked me to test a new firmware version, which I'll also do tomorrow.

Edit: No such problem with mine. I can release the button as soon as the windows start moving, and everything works as it should.
 
#23 ·
$439. You may still be able to get a 10% discount with code C7fever
 
#24 · (Edited)
So, I opened a ticket this morning for the windows not fully going down (see post #20), and I heard back later today (that's nice) from Mods4Cars.

They have a new version of the firmware (V1.04) that's being beta tested, and they offered it to me. I downloaded it to the module and tested it out.

-- The top was down, so I raised it with the remote. The top went up as expected, but the windows didn't go up. My settings are [1,4,4], so the windows should go up when the top goes up. I pressed the lock button three times, and the windows went up.
-- I put the top down with the remote, and the windows went down fully.

I repeated the testing four times in total. Twice when putting up the top with the remote, the windows stayed down, and twice they went up.

When lowering the top, the windows always went down.

So, it seems like they have a little more tuning left with the firmware.
 
#25 ·
I've been working with them, too. I flashed the 1.04 software today, and haven't had any issues with the windows not working properly.

They're a little flummoxed by the car-to-car variation they've encountered with the C7. They say they've never encountered that with any of their other versions. But they seem committed to working the issues until they're resolved.
 
#26 ·
Sounds like a grand modification. When lowering the top its always on my mind to "don't let go of my finger" least the top stop and with my luck would be inop. So I might go for this mod in a couple of months when you smart guys approve of the latest firmware
 
#27 ·
I need to check and see if there's any new firmware, yet. Mine has been working fine as is (version 1.04), so I haven't bothered to check for newer.
 
#30 ·
Not that I'm aware of. Double check their website to be sure, but I haven't seen any notices of updates.
 
  • Like
Reactions: CAB6